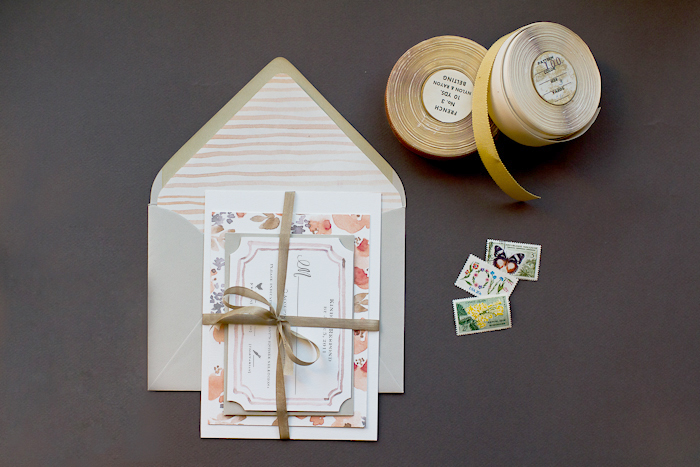
Our invitations
It's been almost four months since our October wedding, and I think I'm finally ready to share more about it. During the actual planning process and all through the day itself, I was pretty overwhelmed with the intensity of the whole thing, but I've sufficiently recovered and I'm excited to show you some of the details I'm most proud of!
At the top of the list are my DIY watercolor invitations. I'm still shocked at how professional they ended up looking! I actually designed, printed, painted, and assembled them on my own at home, with watercolor paper and paint, a low-end HP printer, and an office sized paper cutter I borrowed from my grandma's farm. They were a huge hit and relatively easy to pull off, so here's how it all went down:
We were engaged for 18 months, which is a relatively long amount of time to plan a wedding. I figured that invitations were pretty low on my priority list and knew that I wanted to spend as little money as possible on them, since let's face it: most people maybe stick them on the fridge for a few months then it's into the trash. Since I'm a very crafty person and had lots of time on my hands last summer with the unemployment thing, I decided to make the invitations myself.
Like most brides, I had no idea what I was doing and had to learn everything about stationery and wedding etiquette on the fly. I started looking around the internet for some ideas and discovered the watercolor trend. Here's what I found and used as inspiration:
{soft watercolor invitations by Monumental Designs via the
Ruffled Blog}
Here's my final materials list:
-140 lb. watercolor paper for the invitation card (from JoAnn's with coupons)
-90 lb. watercolor paper for the insert cards (JoAnn's with coupons)
-watercolor paint and brushes (already owned)
-heavy duty paper cutter (borrowed from family)
-basic HP printer and black ink cartridge
-calligraphy pen and ink for addressing envelopes (Michael's with coupon)
-hairspray to treat the addressed envelopes after I discovered the calligraphy ink would smear on the shimmery Quartz color
-pretty stamps from USPS
Steps:
1. Download fancy fonts from
dafont.com or Google Fonts.
2. Make and edit wording on MS Office for invitation, RSVP card, and details card.
3. Format the font sizes and text margins for these dimensions:
Invitation 5" x 7" (fits A7 envelopes)
RSVP and Details 3.5" x 5" (fits 4 bar envelopes)
4. Make PDF files with 2 invitations per regular 8.5" x 11" page, and 4 insert cards per page.
5. Using paper cutter, cut watercolor paper into 8.5" x 11" sheets.
**5. Test your printer on a watercolor sheet to see if it can handle the heavy paper. If not, you'll have to try printing at a professional printer like Staples or Kinko's. Luckily, the basic HP printer I was using could handle up to 140 lb watercolor paper, but some of the invites smeared and had to be discarded. Make sure you have plenty of paper and ink cartridges! I ended up using 1 ink cartridge for 55 invitations.
6. Print!
7. Cut invitations (5" x 7") and insert cards (3.5" x 5") to size.
8. Paint! Be careful not to use too much water, since the paper will warp.
(9. Optional: draw a 5" x 7" location map, scan it at your local library if you don't have a scanner, and print onto vellum paper)
10. Address and stamp envelopes, assemble with invitation, map, RSVP card, RSVP envelope, details card, and mail! I only needed one stamp for each envelope mailed to a US destination (plus a stamp for the RSVP envelopes).
Final Cost: $101 for 55 invitations (not including postage and hours of time!)
I ended up with two versions, a floral one and a purple ombre one. It was fun to decide which invitations to send to which friend or family member!
In progress:
And a few of the best ones that I saved:
The script font I used is Sverige Script Demo from
daFont.com. The lace is a scrap from the lace I used to make
my veil.
If you're currently wedding planning and have more questions, shoot me an email at annikalikes@gmail.com!
And if you want your own watercolor stationery, I've started selling it
in my shop :)