Showing posts with label DIY. Show all posts

Tuesday, November 25, 2014

how to create gorgeous photos and graphics for instagram


It's official: I am obsessed with Instagram. I use my account to share my clean recipes, workouts, random inspirational quotes, and behind the scenes daily life. Come on over and join the party!


I'm also obsessed with making my pictures look pretty by using photo editing apps, and let me tell you, I've tried a gazillion of them. After over a year of 'gramming I've narrowed down my favorites to a select handful and today I'm going to share my top two favorites with you!

I have an iPhone 4 and use it to shoot all my Instagram pictures. (And yes, I'm soooo excited to upgrade my phone so I can finally get a better camera...but I want to prove to you that you don't need the latest fanciest gadgets!)


Here are my go-to's. Some are free, some are a few bucks, but in my opinion every single one of these apps is worth the money. Out of all of these, the ones I've been using daily are PicTapGo  and Word Swag.


This is hands-down my favorite app for making your pictures look crisp, bright, and professional. Use it as a mini Photoshop for filters and editing pictures themselves.

I've tried all the trendy filter apps, including VSCO, Afterlight, Rhonna Magic, and while those are all great too, PicTapGo is the only one I use now.


Whether you're going for clean and crisp, dark and moody, hazy, bright, vintage, or textured, there is a filter for you and you can adjust the intensity of each one.


The best part? You can layer multiple filters and then save and name the "recipe" to create your own signature look. I usually use a combo of Lights On, Awake, and Crispity.


Before (blerg)


After (OH HEYY!)


Ok. I literally just discovered this amazing and glorious text editing app this week. MIND BLOWN! Do you love motivational quotes or graphic text, but don't know how to make your own words look pretty? For the love of creativity and originality, STOP copying and re-posting other people's images and make your own!


In Word Swag you can either import your own picture or choose one of the gazillion free backgrounds.


Then you can either enter your own text or choose from several pre-made quotes.

And THEN. The fun begins. There are so many themes to choose from, and five different designs within each theme. I'm just going to let the pictures do the talking....


I literally whipped up all these designs in about 60 seconds flat. Thank you Word Swag for making me look like a professional graphic designer.

WITH THEIR POWERS COMBINED


I've been using PicTapGo and WordSwag to create some branding images for my Etsy shop. I'm still trying to figure out what my "brand" looks like (and tying together my Facebook page, Instagram, shop, and fitness consulting is an ongoing adventure), but I'm just going to keep playing with things that look good to me and see what emerges!

What do you think? Are you as excited as I was to discover these apps?

Go forth and populate the web with your beautiful images, and leave your Instagram handle in the comments so I can follow you!

xo Anna

Wednesday, March 20, 2013

DIY lace trimmed veil


As you can see by the colors of the leaves in that photo, this week's crafty tutorial is looooong overdue: my DIY lace trimmed veil!

Veils are ridiculously overpriced at bridal boutiques considering that tulle is less than $2 a yard, so I knew from the beginning of wedding planning that I wanted to make my own. After doing a bit of research, I discovered that it's easier than it looks!

Here are the three tutorials that I found most useful (thanks to my friend Laurie for sharing):
The first thing you need to do is choose a style and length. I knew I wanted a single layer (no "blusher" aka the part that goes over your face), fingertip length, and minimal poof-factor.

Supplies I used:
  • 2 yards of 108" wide ivory tulle from JoAnn's (I bought way more than that and it ended up trying to eat me when I unrolled it...you actually don't need that much tulle!)
  • wide metal bridal comb from JoAnn's (use a coupon)
  • needle and white thread
  • rotary cutter and cutting board, or fabric scissors
  • approx. 3-4 yards of wide Alencon lace trim from Etsy 

Here's a close up of the gorgeous lace I got. I lucked out with an amazing per-yard deal, so of course I bought the entire roll. Still deciding what to do with the leftovers...

Sidenote: I was afraid the lace would clash with my dress since the lace is extremely yellowed ivory, my dress was a different ivory, and the lace trim on the dress was white, but it looked fine! You don't have to matchy-match everything.
(That may have sounded type-A but just wait until you're planning a wedding. The subtle differences between white and ivory take on SUCH MEANING and it's scary.)

Step 1: Cut your tulle in the size and shape you want. 
This was the most difficult step for me, because I accidentally bought WAY too much tulle.
I ended up with a half circle shape, 60" along the straight edge by 45" to the widest point (the dimensions are labeled in white in the picture, kind of camouflaged by my floral rug). To cut the shape, the tulle was folded along the 45" line and I cut an arc through the double layers to make sure both sides were even. Then I shaped the top and sides until the curves lay the way I wanted when I draped the tulle from my head.
-If you want a double layered veil, you'll cut a circle or oval shape and sew your comb in the center.
-Refer to the links I shared above to see the lengths you need to reach a certain look. Fintertip veils are 40-45" long.
-Tulle is cheap, so don't be afraid to do some trial-and-error guessing! Cut a shape, drape it over your head, trim if it's not laying in the right way. This one was my second attempt!

Step 2: With your tulle laying on a flat surface such as a clean floor, pin your lace around the edges.
You might have to cut slits or darts in the lace to curve it around the corners.

Step 3: Thread your needle and sew the lace on!
In the above picture you can see that I lined the lace up so that the edge of the tulle came almost to the bottom of the lace trim. I didn't use any fancy stitch, just loosely tacked the lace on. And yes, it takes a long time...turn on a movie! Originally I was going to sew on the top AND bottom of the trim for extra stability but let's face it, that would have been way too much effort. You can apparently buy clear thread so your stitches don't show at all, but I was sick of buying just "one more thing" for the wedding. White thread isn't noticeable, even on ivory lace.

Step 4: Gather the top of your veil by sewing a strip of large straight stitches in the middle of the flat edge
(see awesome illustrated diagram above Step 1 for where the comb goes)
I gathered about a 10" strip because I wanted my veil to lay flat. If you want a poofy veil, gather more of the edge and you can even cut it wider than 60".
You want the length of the gather to equal the width of your comb.

 Step 5: Sew your comb onto the gathered edge.
Orient the veil so that the RIGHT side (side with the lace edge) is FACING the inner curved side of the comb. (So in the above picture, the right side is laying face down on the surface, spread out behind the comb). This way, you can flip the veil over the comb so the veil covers the sewn part before you stick it in your hair, and the lace will be facing outwards. Kind of confusing, but it makes sense when you're playing with it.
To sew on the comb, I just wrapped the thread around and around to make sure it was secured.

And that's it!
  
Here's the final product right after I finished it. Notice how the bottom part (45" from comb to bottom) actually goes BELOW my fingertips. Also, the lace was pretty heavy and dragged the veil down. If you're going for the poofy ethereal look you should use more layers of tulle, gather more of it, and edge it with ribbon, lighter weight lace (like Chantilly) or save yourself some effort and don't edge it at all! Tulle won't fray.

So if you're looking for ways to trim costs while wedding planning I highly recommend trying to make your own veil or headpiece. It's relatively quick as far as DIY projects go (I made mine in one afternoon) and no one will be able to tell if it's not perfect! Plus you will have created a beautiful family heirloom that can be passed down to future brides!

I'll close this post with a few more action shots of our wedding. Wearing a veil definitely made me feel like a little girl playing dress-up, it was kind of surreal and weird.
Also, looking at these photos makes me really miss seeing leaves on the trees...


Do you think you'd attempt making your own veil?

Thursday, March 7, 2013

watercolor tutorial and giveaway!


I'm super excited to be guest posting tonight for Lindsey over at The Postman's Knock, sharing a step by step tutorial for painting watercolor flowers! Seriously, I'm basically giving away all my secrets.

Like what you see? You can also enter to win these four gorgeous notecards with envelopes! Go check out the post to learn how to enter the giveaway.

[If you're already following my blog and would like to enter to win, just leave a comment on this post and I'll add your name to the list!]

Enjoy :)


Wednesday, January 30, 2013

DIY watercolor wedding invitations


Our invitations

 It's been almost four months since our October wedding, and I think I'm finally ready to share more about it. During the actual planning process and all through the day itself, I was pretty overwhelmed with the intensity of the whole thing, but I've sufficiently recovered and I'm excited to show you some of the details I'm most proud of!

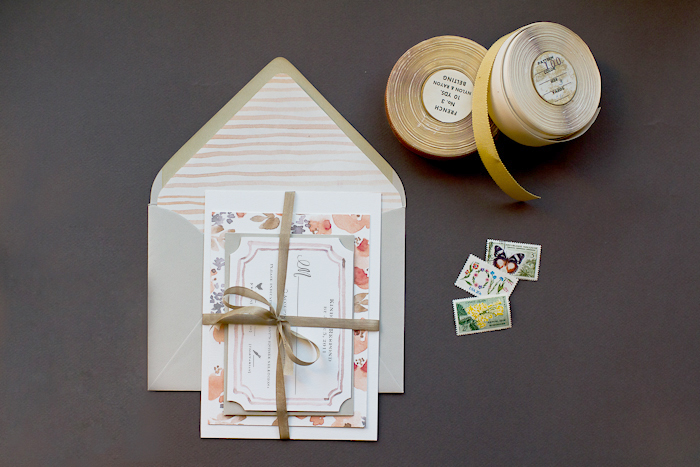
At the top of the list are my DIY watercolor invitations. I'm still shocked at how professional they ended up looking! I actually designed, printed, painted, and assembled them on my own at home, with watercolor paper and paint, a low-end HP printer, and an office sized paper cutter I borrowed from my grandma's farm. They were a huge hit and relatively easy to pull off, so here's how it all went down:

We were engaged for 18 months, which is a relatively long amount of time to plan a wedding. I figured that invitations were pretty low on my priority list and knew that I wanted to spend as little money as possible on them, since let's face it: most people maybe stick them on the fridge for a few months then it's into the trash. Since I'm a very crafty person and had lots of time on my hands last summer with the unemployment thing, I decided to make the invitations myself.

Like most brides, I had no idea what I was doing and had to learn everything about stationery and wedding etiquette on the fly. I started looking around the internet for some ideas and discovered the watercolor trend. Here's what I found and used as inspiration:


{a DIY watercolor tutorial from Oh So Beautiful Paper}

 {soft watercolor invitations by Monumental Designs via the Ruffled Blog}

{watercolor letterpress by the Aerialist Press via Invitation Crush}


The "how to print your own invitation guide" from A Practical Wedding was also very helpful. I proceeded with lots of trial and error.

Here's my final materials list:
-140 lb. watercolor paper for the invitation card (from JoAnn's with coupons)
-90 lb. watercolor paper for the insert cards (JoAnn's with coupons)
-3 5/8" x 5 1/8 " European-Flap RSVP envelopes in Quartz (cardsandpockets.com)
-A7 5.25 x 7.25 European-Flap envelopes in Quartz (cardsandpockets.com)
-OPTIONAL: 40# cream vellum paper for map insert (paperandmore.com)
-watercolor paint and brushes (already owned)
-heavy duty paper cutter (borrowed from family)
-basic HP printer and black ink cartridge
-calligraphy pen and ink for addressing envelopes (Michael's with coupon)
-hairspray to treat the addressed envelopes after I discovered the calligraphy ink would smear on the shimmery Quartz color 
-pretty stamps from USPS

Steps:
1. Download fancy fonts from dafont.com or Google Fonts.
2. Make and edit wording on MS Office for invitation, RSVP card, and details card.
3. Format the font sizes and text margins for these dimensions:
Invitation 5" x 7" (fits A7 envelopes)
RSVP and Details 3.5" x 5" (fits 4 bar envelopes)
4. Make PDF files with 2 invitations per regular 8.5" x 11" page, and 4 insert cards per page.
5. Using paper cutter, cut watercolor paper into 8.5" x 11" sheets.
**5. Test your printer on a watercolor sheet to see if it can handle the heavy paper. If not, you'll have to try printing at a professional printer like Staples or Kinko's. Luckily, the basic HP printer I was using could handle up to 140 lb watercolor paper, but some of the invites smeared and had to be discarded. Make sure you have plenty of paper and ink cartridges! I ended up using 1 ink cartridge for 55 invitations. 
6. Print!
7. Cut invitations (5" x 7") and insert cards (3.5" x 5") to size.
8. Paint! Be careful not to use too much water, since the paper will warp.
(9. Optional: draw a 5" x 7" location map, scan it at your local library if you don't have a scanner, and print onto vellum paper)
10. Address and stamp envelopes, assemble with invitation, map, RSVP card, RSVP envelope, details card, and mail! I only needed one stamp for each envelope mailed to a US destination (plus a stamp for the RSVP envelopes).

Final Cost: $101 for 55 invitations (not including postage and hours of time!)

I ended up with two versions, a floral one and a purple ombre one. It was fun to decide which invitations to send to which friend or family member!

In progress:


And a few of the best ones that I saved:


The script font I used is Sverige Script Demo from daFont.com. The lace is a scrap from the lace I used to make my veil.

If you're currently wedding planning and have more questions, shoot me an email at annikalikes@gmail.com!

And if you want your own watercolor stationery, I've started selling it in my shop :)

Related Posts Plugin for WordPress, Blogger...