Showing posts with label wedding. Show all posts

Wednesday, March 20, 2013

DIY lace trimmed veil


As you can see by the colors of the leaves in that photo, this week's crafty tutorial is looooong overdue: my DIY lace trimmed veil!

Veils are ridiculously overpriced at bridal boutiques considering that tulle is less than $2 a yard, so I knew from the beginning of wedding planning that I wanted to make my own. After doing a bit of research, I discovered that it's easier than it looks!

Here are the three tutorials that I found most useful (thanks to my friend Laurie for sharing):
The first thing you need to do is choose a style and length. I knew I wanted a single layer (no "blusher" aka the part that goes over your face), fingertip length, and minimal poof-factor.

Supplies I used:
  • 2 yards of 108" wide ivory tulle from JoAnn's (I bought way more than that and it ended up trying to eat me when I unrolled it...you actually don't need that much tulle!)
  • wide metal bridal comb from JoAnn's (use a coupon)
  • needle and white thread
  • rotary cutter and cutting board, or fabric scissors
  • approx. 3-4 yards of wide Alencon lace trim from Etsy 

Here's a close up of the gorgeous lace I got. I lucked out with an amazing per-yard deal, so of course I bought the entire roll. Still deciding what to do with the leftovers...

Sidenote: I was afraid the lace would clash with my dress since the lace is extremely yellowed ivory, my dress was a different ivory, and the lace trim on the dress was white, but it looked fine! You don't have to matchy-match everything.
(That may have sounded type-A but just wait until you're planning a wedding. The subtle differences between white and ivory take on SUCH MEANING and it's scary.)

Step 1: Cut your tulle in the size and shape you want. 
This was the most difficult step for me, because I accidentally bought WAY too much tulle.
I ended up with a half circle shape, 60" along the straight edge by 45" to the widest point (the dimensions are labeled in white in the picture, kind of camouflaged by my floral rug). To cut the shape, the tulle was folded along the 45" line and I cut an arc through the double layers to make sure both sides were even. Then I shaped the top and sides until the curves lay the way I wanted when I draped the tulle from my head.
-If you want a double layered veil, you'll cut a circle or oval shape and sew your comb in the center.
-Refer to the links I shared above to see the lengths you need to reach a certain look. Fintertip veils are 40-45" long.
-Tulle is cheap, so don't be afraid to do some trial-and-error guessing! Cut a shape, drape it over your head, trim if it's not laying in the right way. This one was my second attempt!

Step 2: With your tulle laying on a flat surface such as a clean floor, pin your lace around the edges.
You might have to cut slits or darts in the lace to curve it around the corners.

Step 3: Thread your needle and sew the lace on!
In the above picture you can see that I lined the lace up so that the edge of the tulle came almost to the bottom of the lace trim. I didn't use any fancy stitch, just loosely tacked the lace on. And yes, it takes a long time...turn on a movie! Originally I was going to sew on the top AND bottom of the trim for extra stability but let's face it, that would have been way too much effort. You can apparently buy clear thread so your stitches don't show at all, but I was sick of buying just "one more thing" for the wedding. White thread isn't noticeable, even on ivory lace.

Step 4: Gather the top of your veil by sewing a strip of large straight stitches in the middle of the flat edge
(see awesome illustrated diagram above Step 1 for where the comb goes)
I gathered about a 10" strip because I wanted my veil to lay flat. If you want a poofy veil, gather more of the edge and you can even cut it wider than 60".
You want the length of the gather to equal the width of your comb.

 Step 5: Sew your comb onto the gathered edge.
Orient the veil so that the RIGHT side (side with the lace edge) is FACING the inner curved side of the comb. (So in the above picture, the right side is laying face down on the surface, spread out behind the comb). This way, you can flip the veil over the comb so the veil covers the sewn part before you stick it in your hair, and the lace will be facing outwards. Kind of confusing, but it makes sense when you're playing with it.
To sew on the comb, I just wrapped the thread around and around to make sure it was secured.

And that's it!
  
Here's the final product right after I finished it. Notice how the bottom part (45" from comb to bottom) actually goes BELOW my fingertips. Also, the lace was pretty heavy and dragged the veil down. If you're going for the poofy ethereal look you should use more layers of tulle, gather more of it, and edge it with ribbon, lighter weight lace (like Chantilly) or save yourself some effort and don't edge it at all! Tulle won't fray.

So if you're looking for ways to trim costs while wedding planning I highly recommend trying to make your own veil or headpiece. It's relatively quick as far as DIY projects go (I made mine in one afternoon) and no one will be able to tell if it's not perfect! Plus you will have created a beautiful family heirloom that can be passed down to future brides!

I'll close this post with a few more action shots of our wedding. Wearing a veil definitely made me feel like a little girl playing dress-up, it was kind of surreal and weird.
Also, looking at these photos makes me really miss seeing leaves on the trees...


Do you think you'd attempt making your own veil?

Wednesday, March 6, 2013

name changing part 2 (the DMV)

(Us on the plane headed to Mexico for our honeymoon last year. The literal buttcrack of dawn is shining on Ben's face.)

After my trip to the social security office last month, my new SS card arrived in the mail in less than a week. It still has my wrong middle name on it, but I'm going to worry about that later.

Today I set out to accomplish step 2 of the name change ordeal: getting a new driver's license. To make matters more complicated, my parents decided that since I'm married now and officially an adult, it was time to give me the title to the Ford Focus I've been driving since high school. (Just in time for its last legs.) So I had to officially transfer the title over to myself and get a new registration and license plates in addition to changing the info on my license. To make matters less complicated, I fortuitously procrastinated on the name change just long enough that it's time for me to renew my license anyway, so I felt I was lucky to be able to accomplish a triple whammy with only one trip to the dreaded DMV.

A perk to being underemployed is being able to go to the DMV in the morning on a random weekday. I looked up the nearest facility to me, which is about a 20 minute drive away. Apparently there are less driver services facilities in Chicago than there are Social Security offices, but I guess it's fun to explore a new area of town. So I cleaned the mountain of snow off my car and set off to discover the BIGGEST FREAKING DMV office EVER. It was like a warehouse-sized labyrinth of lines, counters, booths, people, oh my God. And it was like 78 degrees which is 14 degrees hotter than I keep our apartment because we're too broke for warmth, so I was immediately parched in my long underwear, two sweaters, and puffy coat. Luckily the lines moved pretty quickly and I made it through the FOUR lines/counters/stations it took to transfer the title, then headed to a different section of the building to deal with my license.

First I had to visit the line at the "check in" counter to get a number and verify that I had the necessary documents, then luckily my number was immediately called to the next counter where an extremely chatty Asian man entered my information and taught me about the etymology of Dutch names (apparently having the "Van" prefix means you are descended from the upper class, sweet!), how Europeans never used to have last names, how Asian cultures don't use middle names, and how his co-worker's son just moved to Davenport (he saw Rock Island on my marriage license). Then I moved to the cashier counter where I paid $30 to renew my license (I got to skip the name change fee because I took care of it at the same time, yay!), on to the pre-photo counter where a lady took my old license away, and then FINALLY got my new picture taken. I'm kind of sad my old license is gone because I loved the picture, but oh well.

So I was in and out in a little over an hour, and now I'm officially Anna Vandervlugt Locke. I want to go by Anna Locke socially but I couldn't eliminate the Vandervlugt. Just thinking about it made me feel really shaken up and panicky. I am not sure how I'll feel about my decision 10 or 20 or 30 years from now but right now, this was the way to go for me. My family is pretty conservative and I've had to explain myself a couple times but you know what? It's 2013, and we can make a choice. Plus, your legal documents have to match but other than that you can be known as any name you want, and I like being able to be Anna Locke without completely giving up the previous identity I've held for the past 25 years.

(I decided to omit the middle name/initial completely on my license just to keep it simpler. I think I'll omit the M on everything else I change too to avoid confusion, and also to buy myself more time before I have to go back to the SS office to correct my card that says Marie when I'm really a Maria.)

So in summary, here are my tips for changing your name on your license in Illinois:
-Go on a weekday morning, if you can!
-You need 2 documents that verify the new name, so get your SS card first (I used SS card and marriage license)
-If you have a new address you need 2 documents to prove that too. I used my new car registration and a pay stub. I also brought our lease just in case.
-If you can, coordinate your trip so it lines up with renewing your license. You'll save the name change fee!
-Renewing and name changing fees are $30 each.
-Transferring a title/renewing registration/getting new license plates is very expensive (almost $200). If you're just changing your name on the title/registration it's only $18.
-They don't take VISA cards (whyyy?), so bring your checkbook and cash if you carry VISA!!
-Here's the link for changing your name on title/registration http://www.cyberdriveillinois.com/departments/vehicles/title_and_registration/corrected.html
-Here's info for changing your name and address https://www.ilsos.gov/addrchange/
-Here's the list of documents you need to update your drivers license http://www.cyberdriveillinois.com/publications/pdf_publications/dsd_x173.pdf

And here are a few articles that were EXTREMELY helpful to me in the whole name change decision process!


I hope you've been entertained and have found my experiences useful if you're engaged! I'm probably not going to share the rest of the name change journey since I can do most of it online. Hopefully I don't forget anything. Oh the joys of being a female...as if society needed to make it even more complicated.


Friday, February 8, 2013

friday adventures and name changing

 
Happy Friday!
 
 
I made a new chunky cowl! I super like it.
Also, I babysit for an extremely talented hair stylist who gave me a trim and blowout last night after she came home! Best gig ever.
 
So, this has been quite the eventful day for me.
Go past the following essay on name changing to get to the best hummus recipe ever.
 
Ben and I have been married for four months now and I've been procrastinating on the whole name-change thing. Lots of reasons, mainly laziness and a little because I'm kind of freaked out with the change concept.
 
When you're engaged, you're suddenly made aware of the drama behind the patriarchal last name tradition, and the choices seem endless. Hyphenate? Keep maiden name? Change? Change socially only? Make maiden name middle name? Merge last names into something completely new? Make husband take maiden name (is it weird that this is not culturally acceptable)? Also, changing your name on every single document, account, card, and address in your life is a big undertaking and let's face it-- a complete identity crisis.
 
My maiden name is Vandervlugt, because my dad was born and raised in the Netherlands. Obviously Dutch culture has been a huge part of my life, and being the only Anna Vandervlugt in North America (that Google is aware of, anyway) is pretty awesome. However, I do really like Ben's last name and think it's important for us to share it as a new family unit, plus he's the last male carrier in his immediate family. On top of that, I always knew Ben wanted me to take his last name and I have no problem with that.
 
In conclusion, I decided a while ago that I'd take Ben's last name but not delete my maiden name. In other words, I'd have two "legal" unhyphenated last names. That way, I could slowly transition into being Anna Locke socially but still be Anna Vandervlugt professionally if I wanted. Yes ladies, you CAN do this!
 
My drivers license expires on my birthday in two months, so this week I decided to take the plunge and undertake the process so I only have to make one trip to the DMV (smart, right??) The first thing you have to change is your name on your Social Security card and I read somewhere that 9 am on Friday is the best time to do that in terms of the line, so this morning I took an official copy of our marriage license, every ID I could find, the Social Security application from here, and hit the icy streets of Chicago in search of the nearest SSA office.
 
After waiting for only 15 minutes, my ticket number was called and I went to the counter with all my documents. At this point, you need to know that my middle name has been Maria my entire life...until the lady at the counter told me I've been on file with the government as Anna Marie since 1988. Whaaaa????! Cue huge confusion. So now my name is Anna Marie alias Maria Vandervlugt Locke.
I called my mom and she verified that my birth certificate does say Maria and some Social Security person in 1988 made a mistake that will take another trip to the office with birth certificate to correct. Sigh. I might just let it go since it hasn't been an issue for 25 years...
 
So that was a fun adventure. If you've read this far and if you're a hummus fan, I'll reward you now with a life changing discovery!
You know how Sabra hummus has that amazing smooth texture that is impossible to re-create if you've ever tried to make hummus at home? And also, you know how Sabra is always like $3 more expensive per tiny little tub than the other inferior hummus brands?
 
The DIY secret to that lucious creamy consistency is to PEEL THE CHICKPEAS.
 
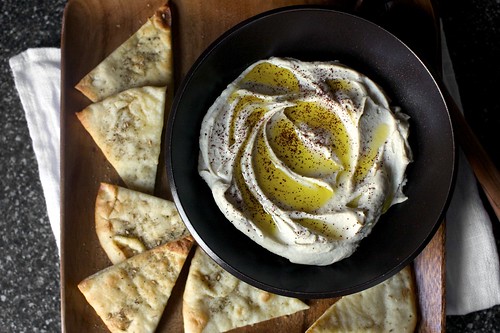
(image from Smitten Kitchen)
 
It takes about 10 minutes to peel a can, but it's well worth the time to achieve amazingly smooth hummus for less than a dollar. I discovered this technique via Deb at Smitten Kitchen (click link to get the recipe) and it has rocked my world.
 
So make hummus and have a great weekend!
I'll keep you updated re: the journey to becoming Mrs. Locke.


Wednesday, January 30, 2013

DIY watercolor wedding invitations


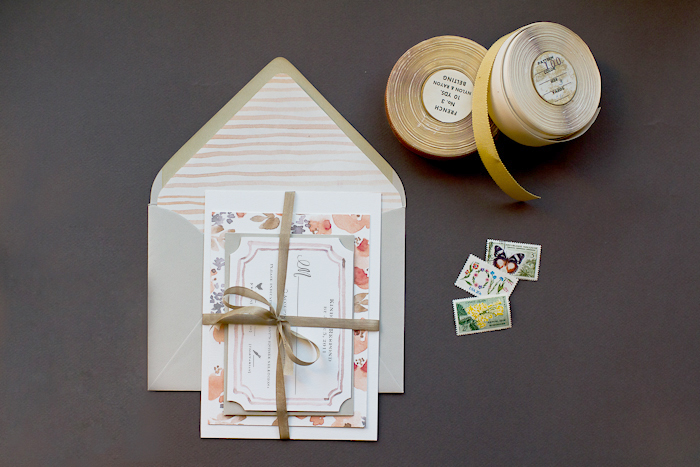
Our invitations

 It's been almost four months since our October wedding, and I think I'm finally ready to share more about it. During the actual planning process and all through the day itself, I was pretty overwhelmed with the intensity of the whole thing, but I've sufficiently recovered and I'm excited to show you some of the details I'm most proud of!

At the top of the list are my DIY watercolor invitations. I'm still shocked at how professional they ended up looking! I actually designed, printed, painted, and assembled them on my own at home, with watercolor paper and paint, a low-end HP printer, and an office sized paper cutter I borrowed from my grandma's farm. They were a huge hit and relatively easy to pull off, so here's how it all went down:

We were engaged for 18 months, which is a relatively long amount of time to plan a wedding. I figured that invitations were pretty low on my priority list and knew that I wanted to spend as little money as possible on them, since let's face it: most people maybe stick them on the fridge for a few months then it's into the trash. Since I'm a very crafty person and had lots of time on my hands last summer with the unemployment thing, I decided to make the invitations myself.

Like most brides, I had no idea what I was doing and had to learn everything about stationery and wedding etiquette on the fly. I started looking around the internet for some ideas and discovered the watercolor trend. Here's what I found and used as inspiration:


{a DIY watercolor tutorial from Oh So Beautiful Paper}

 {soft watercolor invitations by Monumental Designs via the Ruffled Blog}

{watercolor letterpress by the Aerialist Press via Invitation Crush}


The "how to print your own invitation guide" from A Practical Wedding was also very helpful. I proceeded with lots of trial and error.

Here's my final materials list:
-140 lb. watercolor paper for the invitation card (from JoAnn's with coupons)
-90 lb. watercolor paper for the insert cards (JoAnn's with coupons)
-3 5/8" x 5 1/8 " European-Flap RSVP envelopes in Quartz (cardsandpockets.com)
-A7 5.25 x 7.25 European-Flap envelopes in Quartz (cardsandpockets.com)
-OPTIONAL: 40# cream vellum paper for map insert (paperandmore.com)
-watercolor paint and brushes (already owned)
-heavy duty paper cutter (borrowed from family)
-basic HP printer and black ink cartridge
-calligraphy pen and ink for addressing envelopes (Michael's with coupon)
-hairspray to treat the addressed envelopes after I discovered the calligraphy ink would smear on the shimmery Quartz color 
-pretty stamps from USPS

Steps:
1. Download fancy fonts from dafont.com or Google Fonts.
2. Make and edit wording on MS Office for invitation, RSVP card, and details card.
3. Format the font sizes and text margins for these dimensions:
Invitation 5" x 7" (fits A7 envelopes)
RSVP and Details 3.5" x 5" (fits 4 bar envelopes)
4. Make PDF files with 2 invitations per regular 8.5" x 11" page, and 4 insert cards per page.
5. Using paper cutter, cut watercolor paper into 8.5" x 11" sheets.
**5. Test your printer on a watercolor sheet to see if it can handle the heavy paper. If not, you'll have to try printing at a professional printer like Staples or Kinko's. Luckily, the basic HP printer I was using could handle up to 140 lb watercolor paper, but some of the invites smeared and had to be discarded. Make sure you have plenty of paper and ink cartridges! I ended up using 1 ink cartridge for 55 invitations. 
6. Print!
7. Cut invitations (5" x 7") and insert cards (3.5" x 5") to size.
8. Paint! Be careful not to use too much water, since the paper will warp.
(9. Optional: draw a 5" x 7" location map, scan it at your local library if you don't have a scanner, and print onto vellum paper)
10. Address and stamp envelopes, assemble with invitation, map, RSVP card, RSVP envelope, details card, and mail! I only needed one stamp for each envelope mailed to a US destination (plus a stamp for the RSVP envelopes).

Final Cost: $101 for 55 invitations (not including postage and hours of time!)

I ended up with two versions, a floral one and a purple ombre one. It was fun to decide which invitations to send to which friend or family member!

In progress:


And a few of the best ones that I saved:


The script font I used is Sverige Script Demo from daFont.com. The lace is a scrap from the lace I used to make my veil.

If you're currently wedding planning and have more questions, shoot me an email at annikalikes@gmail.com!

And if you want your own watercolor stationery, I've started selling it in my shop :)

Friday, November 30, 2012

October 6, 2012


I will remember every detail of that chilly, overcast October day. 

Waking up from excitement at 6 am in the hotel room I was sharing with my best friend and looking out at the sunrise over the Mississippi, thinking that this was a beautiful day to get married.

Popping champagne in the salon with all my bridesmaids while blasting the Cyndi Lauper Pandora station. 

Picking up lunch at Panera in street clothes and a veil.

Putting on makeup in the hotel and getting a peek out the door of my dad wearing his fathers' suit and top hat with the guys in the hall. That's the moment I knew this was for real.

How exhausted I felt from not being able to sleep the week before.

Meeting Ben under the arches for our first look, and finally releasing all the anxiety and tension and replacing them with calm and excitement and love. 

Standing outside the chapel doors with my bridesmaids and parents right before the ceremony, and my mom telling me that this was exactly how she'd wished I would look on my wedding day.

Stepping into the golden light of the chapel with my dad, and feeling surrounded and overwhelmed by love and joy.

Freaking out when Ben started saying his vows, because he started crying and then I started crying and I didn't know how I'd get through mine. 

(I ended up starting great, until we both started church-giggling at how surreal it all was.)

The reception was just how I wanted it: relaxed, fun, intimate, like a dinner party with all my favorite people in which I just so happened to be wearing an ivory ballgown.

My little sisters delivered a toast full of cheesy childhood stories and songs.

My bustle ripped out during a Dutch party dance and I didn't even care.

Ben and I danced to Green Eyes by Coldplay.

I accomplished my reception priority: getting to eat my own wedding cake.

The day didn't fly by like everyone said it would. It actually unfolded in perfect time (after an intense and hectic morning) and when the party was over I was ready to leave with my new husband and begin the rest of our lives.
  

Our amazing photographer Christy has posted our wedding photos on her blog so this is an excited announcement to go check them out if you are into weddings :)

These photos of us under the arches at Augustana are my favorite, in part because Ben showed them to his (Southside Chicago) students and they said I looked like Tinkerbell.


Monday, August 20, 2012

an epic night on the town

I feel SO lucky and blessed to have an amazing group of women in my life. I had absolutely no trouble choosing bridesmaids for our wedding, since I automatically had three sisters/sis-in-law and then three I consider best friends from different stages of the past, literally from infancy through college. I'm also lucky to have them all within driving distance (minus Ellie who flies back to Slovakia this week, wahh) and am so happy we were able to meet up in Chicago this past weekend for the perfect bachelorette party.

I am not usually a super-crazy-let's dress up like fools for attention and go out dancing till 2 am-type of girl, but she definitely does exist within me to emerge for very special occasions such as this one. I embraced the tiara, sash, and personalized buttons and just went with the flow. The flow of drinks, that is. The night started with pink fizzy punch and pizza and just amped up from there. Ben and I haven't made it downtown since we moved here almost 3 weeks ago (WHAAT!) so it was fun to hop on the L and hit the city for the first time as an official resident and not local tourist (weird!!!)

And we even got some safe-for-internet photos:


Self-timer rockstars.

Christine! Livin it up like we're back in college.
Hostess/sis in law Ashley (and a photobomb). No, I am not actually wearing a Vegas showgirl style headpiece, but that would have been hilarious.
Oh, also, we played a quick round of Quelf. Which should be played at all parties.
 
Sisters! 
 The most delicious pizza ever. Homemade crust and fresh mozzarella yesssss. I think it honestly was extraordinary, despite every single thing I ate all night having the label of "most delicious ever."
 Making friends on the L.  Thanks for putting up with us, random fellow passengers!

 Downtown! So. much. walking. I have the blisters to prove it.

 Aaaand then we went to a drag show. Wonderful decision. Although kind of disturbing to see "men" who were prettier than us.
I never fail to get the hiccups. Luckily they are cured by biting on a slice of lemon or lime! Every single time. Try it!

 We were miraculously still alive the next morning, and dragged the guys out for brunch. Thanks for being such good sports re: the party headbands, guys :)  Ashley lives on the border of Boystown and Wrigleyville so we didn't get many second glances walking around at 2 pm wearing them. Good times, good times.

My favorite part of a good party weekend is laying around the next day and re-hashing the night's events, when all of a sudden it becomes clear how ridiculous and hilarious it all was.


Wednesday, May 11, 2011

a spring engagement story


This post is getting to be long overdue!
I thought that life was going to calm down a little bit after I finished the thesis....
Little did I know that the excitement and craziness was just beginning.

I turned 24 on April 26th. It was one of the first legitimately warm, sunny days of spring so Ben and I went on a birthday hike. We walked along a ridge line until we came to a huge overlook, where he knelt on the rocky trail and asked me to marry him with his grandmother's ring.
Yes, BEST BIRTHDAY PRESENT EVER!
I am still getting used to not having a "boyfriend" anymore, after four and a half amazing years.
And I am so excited to marry my best friend and the love of my life!


Related Posts Plugin for WordPress, Blogger...